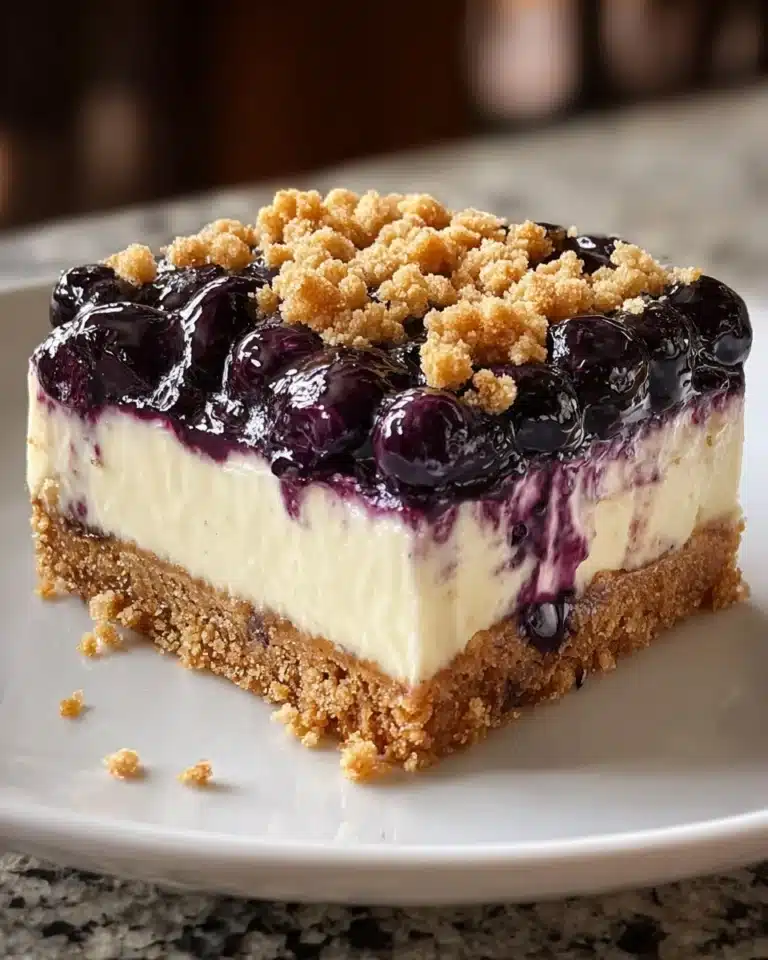
If you’re searching for a luscious, summery dessert that’s as easy as it is impressive, let me introduce you to my personal favorite: No Bake Blueberry Cheesecake Bars. Creamy, rich, and crowned with a homemade blueberry curd, these bars combine vibrant color with irresistible flavor, all without turning on your oven. They’re the kind of treat you’ll want in your fridge all season long—perfect for picnics, potlucks, or just because you need a pick-me-up on a Tuesday!
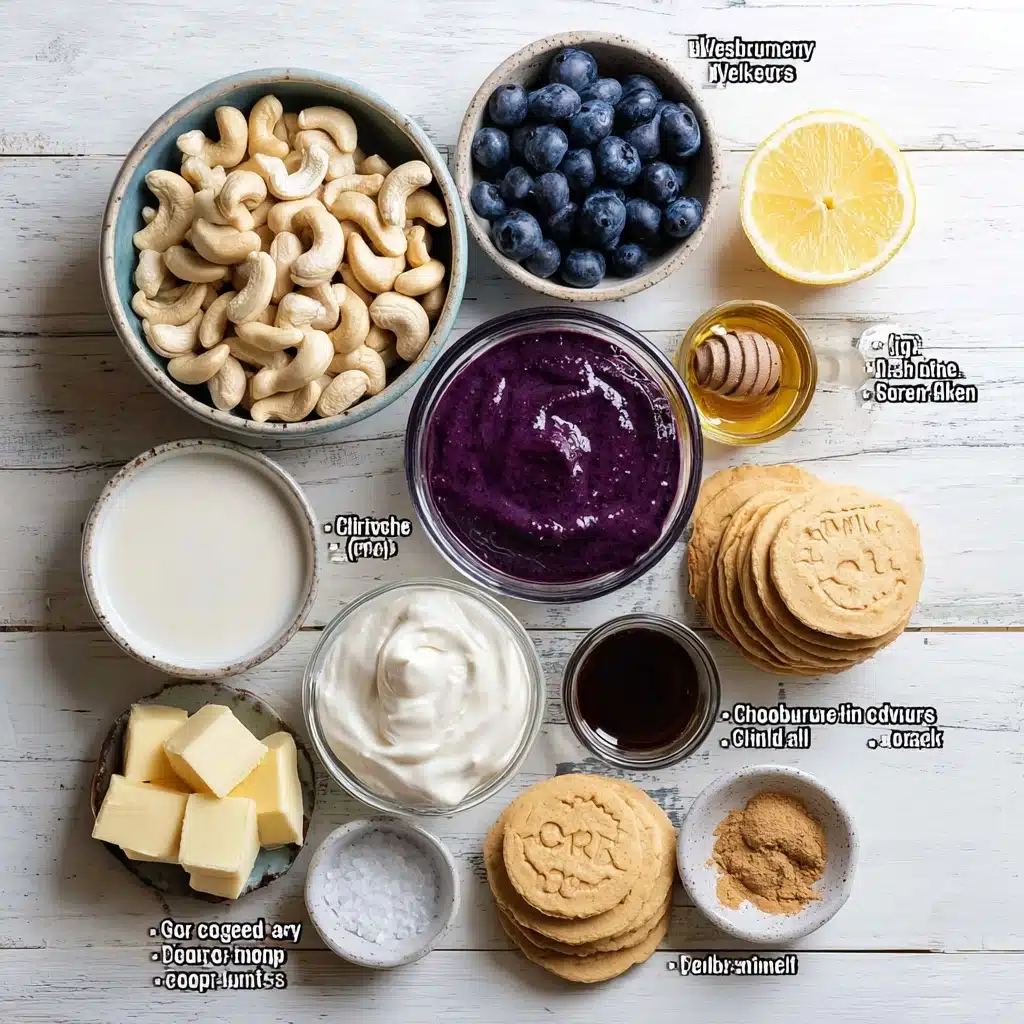
Ingredients You’ll Need
It’s amazing how a handful of well-chosen ingredients can yield such fabulous results. Each one plays its own role—crunch in the crust, silkiness in the filling, tang from the topping. This is truly a recipe where every part shines!
- Blueberry curd: Make it ahead for a luxurious, tangy topping bursting with ripe blueberry flavor and eye-catching color.
- Ginger nut or digestive biscuits: These sturdy cookies form the crunchy base; use vegan graham crackers or gluten-free cookies if you prefer.
- Sea salt: Just a pinch sharpens all the flavors and balances the sweetness of the crust.
- Vegan butter (block-style): Holds the crust together with a rich, buttery bite—be sure to use the firmer block, not soft tub spreads.
- Cashews (soaked): These are the secret to that ultra-creamy, dreamy filling, blending up smooth with no dairy in sight.
- Vegan cream cheese: For classic cheesecake tang and extra creamy texture—trust me, it really makes a difference.
- Vegan Greek-style yogurt or Skyr: Choose a thick-style plant yogurt for body and a hint of tart richness (go coconut for soy-free).
- Coconut oil: Helps the filling set perfectly, so the bars slice neatly and hold their shape right out of the fridge.
- Agave syrup or maple syrup: For subtle, natural sweetness that pairs beautifully with the blueberries.
- Lemon juice (freshly squeezed): Just a splash brings brightness to the filling and plays wonderfully with the berries.
- Vanilla bean paste or extract: Adds those warm, floral vanilla notes that make the filling taste extra special.
- Ground cinnamon: A tiny bit adds cozy depth that you’ll notice in every forkful.
How to Make No Bake Blueberry Cheesecake Bars
Step 1: Prepare Your Ingredients
Begin by making your blueberry curd up to two days ahead so it’s ready to go when you assemble the bars. Cashews need a little planning too—soak them in water for about four hours, or use the quick method in the notes if you’re short on time. Finally, line your loaf pan with parchment paper for easy removal once everything’s set. A little prep now means effortless assembly later!
Step 2: Make the Crust
Add your cookies and sea salt to the food processor and blitz until you get fine, sandy crumbs. Melt your vegan butter, add it to the mix, and whizz a few more seconds. You’ll know it’s ready when the mixture clumps together when pressed—this ensures the base is sturdy and satisfying. Press it firmly into your lined pan, smoothing with your fingers or the back of a spoon to create an even layer. Pop it in the fridge to chill while you move on.
Step 3: Blend the Filling
Set up your high-speed blender and load in the soaked, drained cashews, vegan cream cheese, yogurt, coconut oil, agave or maple syrup, lemon juice, vanilla, and cinnamon. Blitz everything until you can see it’s impossibly smooth and creamy, with no lumps or graininess. If necessary, use a spatula to scrape down the sides. Pour this mixture over your chilled crust and give the pan a gentle shake to level it out. It’s already looking delicious!
Step 4: Chill and Set
This is the hard part—waiting! Cover your pan and let the bars set in the refrigerator for at least five hours, though overnight is even better. The filling will firm up, making it easy to slice beautiful bars that hold together perfectly. Use this time to get your topping ready or maybe even dream up your garnish ideas.
Step 5: Add the Blueberry Curd Topping
When you’re ready, gently warm the blueberry curd in a bowl set over a double boiler, stirring constantly until it loosens up just enough to spread. Avoid overheating—you want it spreadable but not hot enough to melt the filling underneath. Spoon the curd over your set cheesecake, smoothing it out for that vibrant, bakery-window finish. Chill the whole thing for another 30 minutes to an hour so the topping can set nicely.
Step 6: Slice and Serve
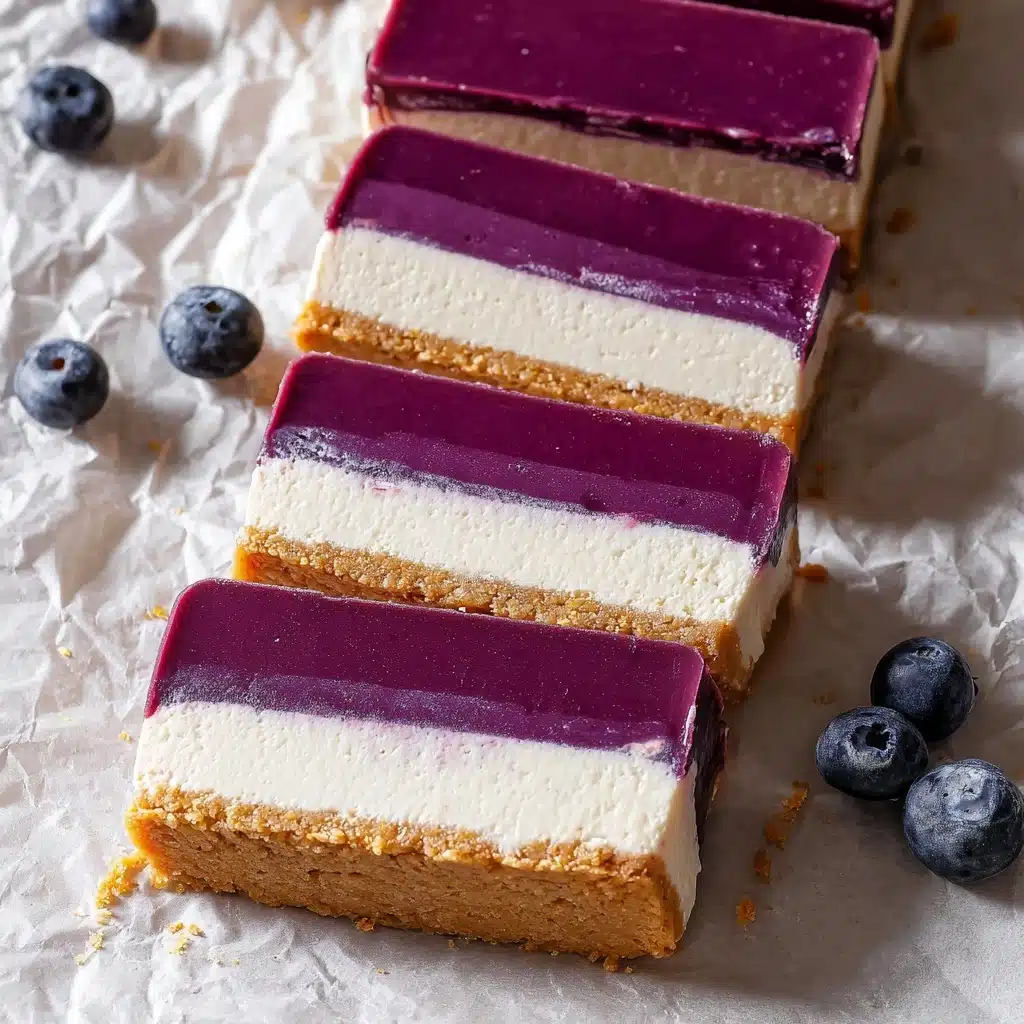
Once everything is chilled and firm, you’re ready for that first glorious slice! Run a sharp knife under hot water, wipe it dry, then cut your bars cleanly. You’ll reveal gorgeous, creamy layers with that irresistible purple gleam on top—all that’s left to do is dig in and savor every bite.
How to Serve No Bake Blueberry Cheesecake Bars
Garnishes
Elevate your No Bake Blueberry Cheesecake Bars by sprinkling the top with fresh blueberries, a flurry of lemon zest, or a few mint leaves for a pop of color and freshness. You can also dust a little extra cinnamon or add some edible flowers to really show off your dessert flair.
Side Dishes
These bars pair beautifully with a simple fruit salad—try strawberries, blackberries, or sliced peaches for a full-on summer treat. If you’d like something richer, serve alongside coconut whipped cream, or even a light almond biscotti for a contrasting crunch.
Creative Ways to Present
Transform your bars into a show-stopping dessert board by arranging slices with extra blueberries, lemon wedges, and crisp cookies. Or, serve them parfait-style in small jars: alternate cubes of crust and filling, then top with blueberry curd and a sprinkle of granola—a perfect grab-and-go dessert!
Make Ahead and Storage
Storing Leftovers
Keep any extra No Bake Blueberry Cheesecake Bars in a covered container in the refrigerator, and they’ll stay fresh for up to five days. The flavors deepen beautifully as they sit, making them perfect for prepping ahead for gatherings or indulgent afternoon snacks.
Freezing
Packed in a freezer-safe container, these cheesecake bars freeze surprisingly well for up to a month. Layer parchment between slices so they don’t stick. When you’re ready to enjoy, simply thaw them overnight in the fridge for the same creamy texture and bold blueberry flavor.
Reheating
Good news—no reheating needed! These bars are at their best when chilled straight from the fridge. If you’ve frozen your batch, let them thaw gently in the refrigerator so the filling stays velvety and the crust keeps its structure.
FAQs
Can I make No Bake Blueberry Cheesecake Bars gluten free?
Absolutely! Just swap out the standard biscuits for your favorite gluten-free cookies or try a wholefood crust. The bars will still be delightfully creamy and flavorful—no one will ever guess they’re gluten free.
What’s the best way to soak cashews for the filling?
For the creamiest filling, soak raw cashews in water for about four hours, then drain and rinse. If you’re short on time, pour boiling water over them and soak for 30 minutes—just as effective and a real lifesaver when dessert cravings strike.
Can I use non-vegan ingredients in this recipe?
Yes! If you don’t need a vegan or dairy-free dessert, feel free to use regular cream cheese, Greek yogurt, and butter. The bars will still come out with a gorgeous layered look and dreamy texture.
What can I use instead of blueberry curd?
If blueberries aren’t your thing, swap in lemon curd, raspberry coulis, or even a simple fruit compote. Each brings its own delicious twist to the No Bake Blueberry Cheesecake Bars, letting you personalize the dessert to your tastes or seasonal fruit.
How do I get clean slices when cutting the bars?
The secret is a hot, sharp knife. Run your knife under hot water, dry it off, and slice straight down. Wipe the blade between every cut for those perfect bakery-style squares that show off the luscious layers.
Final Thoughts
These No Bake Blueberry Cheesecake Bars are exactly the kind of treat I turn to when I want something special but low-fuss. They’re sweet, tangy, creamy, and oh-so-beautiful—a guaranteed hit for any occasion. Give them a try, whether you’re sharing with friends or keeping a secret stash in the fridge for just yourself. Happy (no) baking!
Print
No Bake Blueberry Cheesecake Bars Recipe
- Total Time: 6 hours 30 minutes
- Yield: 8 servings
- Diet: Vegetarian
Description
These No-Bake Blueberry Cheesecake Bars are a delightful combination of creamy, tangy cheesecake filling on a buttery biscuit crust, topped with a luscious blueberry curd. Perfect for a refreshing dessert!
Ingredients
Make-Ahead
- 1 batch blueberry curd
Crust
- 140 g (1⅔ cups) ginger nut or digestive biscuits vegan graham crackers,*see note 1 for GF option
- ½ teaspoon sea salt
- 45 g (3½ tbsp) vegan butter (block-style)
Filling
- 150 g (1 cup + 2tbsp) cashews soaked *see note 2
- 200 g (7 oz) vegan cream cheese
- 80 g (⅓ cup) vegan Greek-style yogurt or vegan Skyr *see note 3
- 30 g (7½ tsp) coconut oil
- 2 tablespoons agave syrup or maple syrup
- 1 tablespoon lemon juice freshly squeezed
- 1 teaspoon vanilla bean paste or vanilla extract
- ¼ teaspoon ground cinnamon
Instructions
- Prepare: Make the blueberry curd up to 2 days ahead and refrigerate until ready to use. Pre-soak the cashews as per the recipe notes. Line the base and sides of a 9″ loaf pan with parchment paper.
- Make the crust: Add the cookies and salt to a food processor and blitz for a minute or so until finely ground. Add the butter and blend again until the mixture sticks together between your fingers. Press the crust into the base of the pan and smooth it down with your fingers or using a spoon – make sure it is compact. Refrigerate while you make the filling.
- Make the filling: Add all of the filling ingredients to a high-speed blender and blitz until smooth and creamy without any lumps. Pour the filling into the pan and refrigerate for a minimum of 5 hours (or overnight) until set.
- Add the topping: Add the blueberry curd to a large bowl and very gently heat it over a double boiler while stirring so that it becomes a spreadable consistency – be careful not to overheat it as you don’t want it to melt the cheesecake. Add the curd on top of the set cheesecake, smoothing it out with the back of a spoon. Refrigerate for another 30 minutes to an hour before serving.
- Serving and storage: Once set, use a hot wet sharp knife to cut it into servings. They will keep for up to 5 days in a covered container in the fridge. They should keep well in a freezer-safe container for up to a month. To serve, simply defrost in the fridge overnight.
Notes
- Gluten-Free: To make them GF, go for gluten-free cookies or use a wholefood crust like in my lemon cheesecake bars.
- Soaked cashews: soak the cashews in water for 4 hours, rinse, and drain. You can also quick-soak your cashews by soaking them in boiled water for 30 minutes.
- Yogurt: Use thick coconut yogurt for a soy-free option.
- Prep Time: 30 minutes
- Category: Dessert
- Method: No-Bake
- Cuisine: American
Nutrition
- Serving Size: 1 bar
- Calories: 320
- Sugar: 15g
- Sodium: 220mg
- Fat: 20g
- Saturated Fat: 9g
- Unsaturated Fat: 8g
- Trans Fat: 0g
- Carbohydrates: 30g
- Fiber: 2g
- Protein: 5g
- Cholesterol: 0mg

