If you grew up sneaking Pop Tarts into your backpack or stashing a few away for midnight snacks, this recipe is going to make you feel like a little kid again—only better! Easy Homemade Pop Tarts with Pie Crust are the ultimate nostalgic treat, but with a buttery, flaky crust and your favorite preserves or jams packed inside. They’re not only a blast to make (hello, customizable fillings and fun decorations!) but also incredibly satisfying to eat, whether you love them for breakfast or as an anytime snack. Forget store-bought; these Pop Tarts are fresh, gooey, and glorious from the first bite to the last crumb.

Ingredients You’ll Need
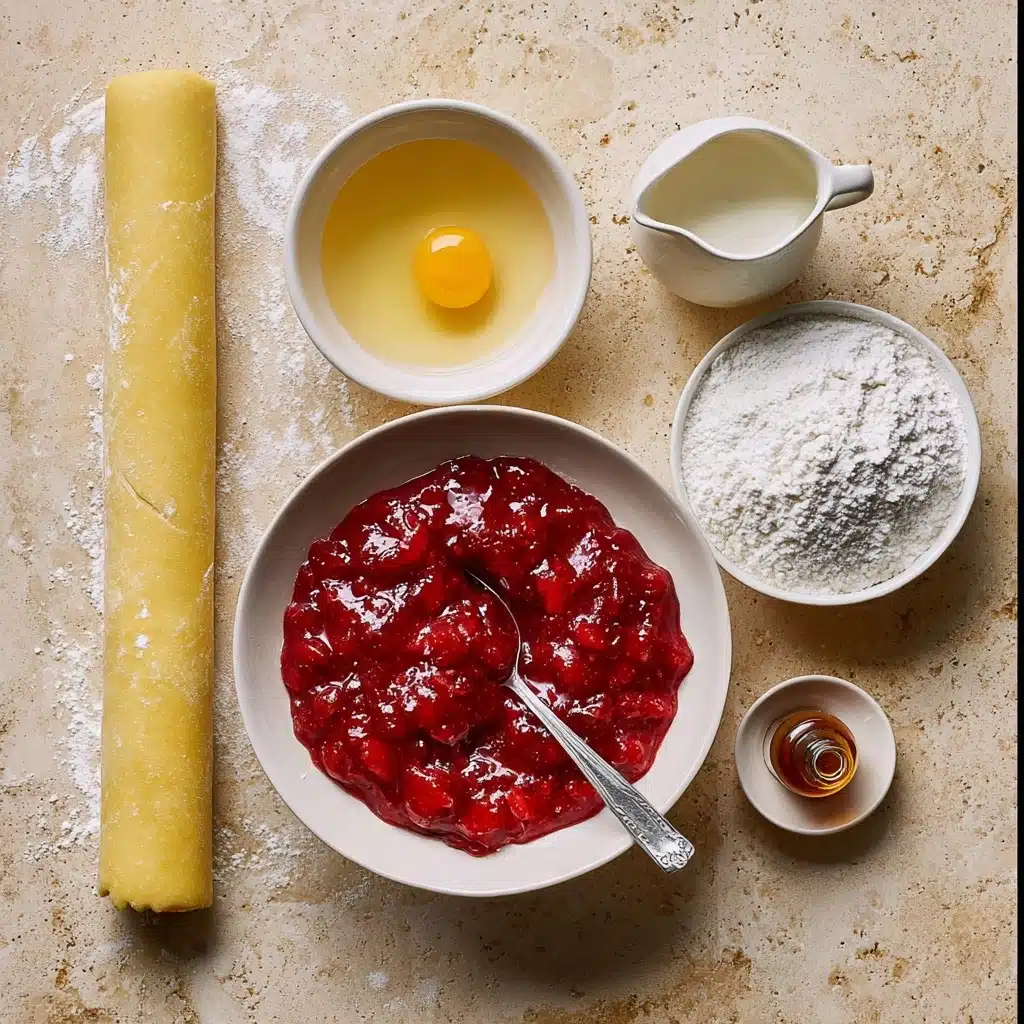
One of the best parts about these Easy Homemade Pop Tarts with Pie Crust is how the simple ingredient list transforms into such a colorful, bakery-quality treat. Each ingredient brings its own magic—flaky crust, tangy-sweet filling, and that irresistible frosted finish.
- Pie Crust: Store-bought rolled pie crust (or homemade!) gives you a buttery, flaky shell without fuss.
- Jam or Preserves: About 1 cup plus 2 tablespoons of your favorite jam—think classic strawberry, bold raspberry, or even a tangy apricot.
- Egg: One large egg is all you need for a sealing and golden, glossy finish.
- Powdered Sugar: For that sweet, silky glaze on top.
- Milk or Cream: Just 2 to 3 tablespoons brings your icing together smoothly.
- Additional Jam (for Icing): A little more jam (about 2 tablespoons) colors and flavors the frosting.
- Vanilla Extract: Just a touch (1/2 teaspoon) for delightful vanilla fragrance in your icing.
How to Make Easy Homemade Pop Tarts with Pie Crust
Step 1: Prepare Your Workspace
Start by preheating your oven to a toasty 400°F—you want that high heat for a crisp, golden finish. Line a baking sheet with parchment paper to prevent sticking (and make for a breezy cleanup later on). Unroll your pie crust onto another sheet of parchment; this will keep it from grabbing hold of your countertop.
Step 2: Cut Out the Pop Tart Rectangles
Take an index card (or use a ruler) as your trusty guide and slice the pie crust into as many 3-inch by 5-inch rectangles as you can. Gather up any leftover scraps, roll them out just under 1/4-inch thick, and keep cutting. You’ll end up with 8 to 10 rectangles—enough to bring a smile to everyone’s face.
Step 3: Fill and Seal
Beat your egg in a small bowl for an easy egg wash. Arrange half of your rectangles on the parchment-lined tray. Spoon 1 1/2 tablespoons of jam onto each one, keeping it right in the center. Brush the edges with egg wash for glue, then top each with another rectangle. Press gently around each border, then use a fork to crimp and seal—don’t skip this, it’s what keeps all that oozy filling inside!
Step 4: Vent, Brush, and Bake
Poke a few small holes in the top of each tart to allow steam to escape. Brush the tops (and those lovely crimped edges) with more egg wash so you get that glimmering, golden color. Slide that tray into the oven and bake for 12 to 15 minutes until the tarts are irresistible and golden brown.
Step 5: Make the Icing and Decorate
Once the tarts have cooled a bit—if you can wait—whisk together the powdered sugar, milk or cream, a couple tablespoons of jam, and vanilla until smooth and lustrous. Spread a generous layer over each tart. Feel free to get fancy: add sprinkles, crushed freeze-dried berries, or even edible rose petals for an extra pop of charm. Then try not to eat them all at once!
How to Serve Easy Homemade Pop Tarts with Pie Crust
Garnishes
Does anything say homemade quite like a shower of colorful sprinkles? Top your Easy Homemade Pop Tarts with Pie Crust using classic rainbow sprinkles, a dusting of powdered sugar, crushed freeze-dried berries, or even a drizzle of extra glaze. The more playful the finish, the more smiles at the breakfast table!
Side Dishes
Pair these heavenly tarts with a tall glass of cold milk, a latte, or your go-to hot cup of coffee for pure breakfast bliss. Want to turn them into a fun brunch spread? Add a bowl of fresh mixed berries or a simple fruit salad alongside for bright, juicy contrast.
Creative Ways to Present
Host a Pop Tart “bar” and let everyone choose their own fillings and toppings—it’s a wild hit at kid parties or sleepovers! You can also package a few tarts in wax paper with ribbon as a homemade edible gift, or stack them high on a pretty tiered cake stand for a brunch centerpiece that disappears fast.
Make Ahead and Storage
Storing Leftovers
While Easy Homemade Pop Tarts with Pie Crust are at their best fresh and warm, you can keep any extras in an airtight container at room temperature for up to two days. This keeps the crust from turning soggy and locks in that sweet-tart filling.
Freezing
If you want to have homemade Pop Tarts ready at a moment’s notice, let the baked (and unfrosted) tarts cool fully, then freeze in a single layer on a tray. Once solid, transfer to a zip-top bag or freezer-safe container, and they’ll last up to 2 months. Frost them after thawing for best results!
Reheating
Pop a leftover tart into the toaster oven or air fryer for a few minutes to crisp them back up and revive the filling. If you’re reheating a frosted tart, try a very short microwave burst so the icing doesn’t melt away, or simply enjoy it at room temperature—the frosting softens beautifully!
FAQs
Can I use any kind of jam or filling?
Absolutely! One of the best parts of Easy Homemade Pop Tarts with Pie Crust is how flexible they are. Use strawberry, blueberry, raspberry, apricot, or even homemade chia jam. You can even sneak in some chocolate-hazelnut spread or nut butters for a fun twist.
Do I need a special pastry cutter or can I just use a knife?
No fancy tools required—just a sharp kitchen knife or even a pizza cutter works wonders for trimming the pie crust into neat rectangles. An index card makes a surprisingly handy guide for size consistency!
Can I make these gluten-free or vegan?
Yes! If you use a gluten-free pie crust (store-bought or homemade) and opt for a plant-based milk in the icing, you’re good to go. For a vegan version, just replace the egg wash with a mixture of plant milk and a bit of maple syrup.
How thick should I roll the dough if making homemade pie crust?
Keep your crust on the thinner side, just under 1/4 inch thick. Too thick, and the tarts will feel doughy rather than flaky; too thin, and you risk them splitting open with all that jammy goodness inside.
Can kids help out with this recipe?
Absolutely! Little hands love helping to fill, crimp, and decorate these tarts. Lay out ingredients, hand over a spoon, and let them get creative with sprinkles or drizzle—it’s a fantastic way to make kitchen memories together.
Final Thoughts
If you’re craving a taste of childhood or just want a joyful, DIY breakfast that delivers on every bite, Easy Homemade Pop Tarts with Pie Crust are your answer. Give them a try, have fun with fillings and frostings, and enjoy the excitement of sharing these golden pastries with people you love!
Print
Easy Homemade Pop Tarts with Pie Crust Recipe
- Total Time: 35 minutes
- Yield: 8-10 pop tarts
- Diet: Vegetarian
Description
These Easy Homemade Pop Tarts with Pie Crust are a delightful treat that can be enjoyed for breakfast or as a snack. Made with a flaky pie crust and filled with your favorite jam, these homemade pop tarts are sure to be a hit with everyone.
Ingredients
Pie Crust:
- 1 package rolled pie crust (7.5 oz pack) or homemade crust
Filling:
- 1 cup plus 2 tablespoons jam or preserves
- 1 large egg
Icing:
- 1 cup powdered sugar
- 2–3 tablespoons milk or cream
- 2 tablespoons jam
- 1/2 teaspoon vanilla
Instructions
- Preheat oven to 400°F. Lay out the pie crust and cut into rectangles.
- Prepare the pop tarts: Add jam to half of the rectangles, then top with the remaining rectangles. Seal the edges and bake for 12-15 minutes.
- Make the icing: Combine powdered sugar, milk, jam, and vanilla. Spread over cooled pop tarts.
- Enjoy: Add toppings like sprinkles or freeze-dried berries, if desired.
Notes
- Store pop tarts in an airtight container for up to 2 days.
- Experiment with different jam flavors for variety.
- Avoid overfilling the pop tarts to prevent leaks.
- Ensure edges are sealed well for a neat appearance.
- Prep Time: 20 minutes
- Cook Time: 15 minutes
- Category: Breakfast, Snack
- Method: Baking
- Cuisine: American
Nutrition
- Serving Size: 1 pop tart
- Calories: 232 kcal
- Sugar: 30g
- Sodium: 83mg
- Fat: 5g
- Saturated Fat: 1g
- Carbohydrates: 47g
- Fiber: 1g
- Protein: 1g
- Cholesterol: 1mg

