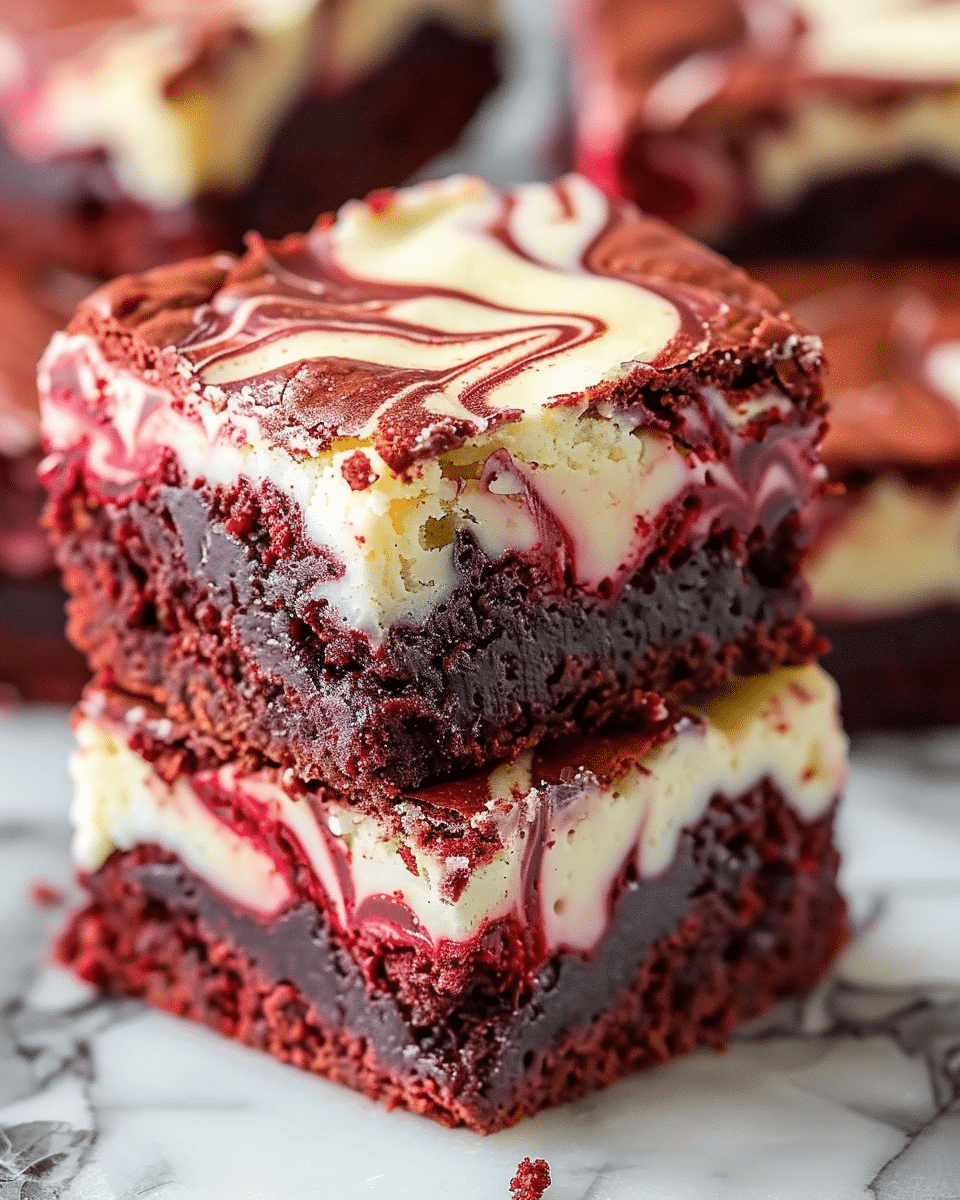
These Red Velvet Cheesecake Swirl Brownies are a show-stopping dessert that combines the rich, cocoa-kissed flavor of red velvet with a creamy cheesecake swirl. With their striking marbled appearance and indulgent taste, they’re perfect for holidays, parties, or anytime you want to impress. Simple to make yet decadent in flavor, every bite is the perfect balance of fudgy brownie and tangy cheesecake.
Why You’ll Love This Recipe
-
Visually Stunning: The red velvet base swirled with cheesecake looks as good as it tastes.
-
Rich & Creamy: A fudgy brownie layer meets a smooth, tangy cheesecake swirl.
-
Perfect for Any Occasion: Great for Valentine’s Day, Christmas, birthdays, or potlucks.
-
Customizable: Easily add chocolate chips, sprinkles, or adjust the shade of red to your liking.
-
Simple Yet Impressive: A straightforward recipe with bakery-quality results.
Ingredients
(Tip: You’ll find the full list of ingredients and measurements in the recipe card below.)
For the Red Velvet Brownie Layer
3/4 cup unsalted butter, melted
1 cup granulated sugar
2 large eggs
2 teaspoons vanilla extract
1 tablespoon red food coloring
1 teaspoon white vinegar
1 1/4 cups all-purpose flour
1/4 cup unsweetened cocoa powder
1/4 teaspoon salt
For the Cheesecake Swirl
8 ounces cream cheese, softened
1/4 cup granulated sugar
1 large egg
1/2 teaspoon vanilla extract
Directions
-
Preheat Oven:
Preheat to 350°F (175°C). Line an 8×8-inch baking pan with parchment paper, leaving an overhang for easy removal, or grease well. -
Make the Red Velvet Brownie Batter:
In a large bowl, whisk melted butter and sugar until smooth.
Add eggs, vanilla, red food coloring, and vinegar. Mix until combined.
Sift in flour, cocoa powder, and salt. Fold gently until just incorporated—do not overmix.
Pour most of the batter into the prepared pan, reserving about 1/4 cup for swirling. -
Prepare the Cheesecake Swirl:
In a medium bowl, beat cream cheese and sugar until smooth.
Add egg and vanilla extract, mixing until creamy and lump-free. -
Assemble & Swirl:
Spread the cheesecake mixture evenly over the brownie batter in the pan.
Drop spoonfuls of the reserved brownie batter on top. Using a knife or toothpick, gently swirl to create a marbled effect. -
Bake:
Bake for 25–30 minutes, or until the center is set and a toothpick inserted comes out with a few moist crumbs. Avoid overbaking. -
Cool & Serve:
Let brownies cool completely in the pan. Use the parchment overhang to lift them out, then slice into squares.
Servings and timing
Servings: 12–16 brownies
Prep Time: 10 minutes
Cook Time: 25–30 minutes
Total Time: 35–40 minutes
Variations
-
Chocolate Chip Upgrade: Fold in white or dark chocolate chips for added texture.
-
Festive Flair: Top with sprinkles or crushed candy canes for a holiday touch.
-
Natural Coloring: Use beetroot powder or natural red food dye for a subtler hue.
-
Bigger Batch: Double the recipe for a 9×13-inch pan and bake for 35–40 minutes.
-
Extra Fudgy: Add 2–3 ounces of melted chocolate to the brownie batter.
Storage/Reheating
Store brownies in an airtight container in the refrigerator for up to 5 days.
For longer storage, freeze for up to 3 months. Thaw in the fridge before serving.
Enjoy cold for a cheesecake-like bite or at room temperature for a fudgier texture.
FAQs
Can I use natural food coloring instead of liquid red dye?
Yes, beetroot powder or natural food coloring works for a subtler, earthy red.
How do I know when the brownies are done?
They’re ready when a toothpick inserted comes out with a few moist crumbs but not wet batter.
Can I make these gluten-free?
Yes, use a 1:1 gluten-free flour blend for the same results.
Why do I need vinegar in red velvet brownies?
It enhances the red color and balances sweetness with a slight tang.
Can I double the recipe?
Yes, bake in a 9×13-inch pan for 35–40 minutes.
Do these need to be refrigerated?
Yes, because of the cheesecake swirl, store them in the fridge.
Can I add more cocoa powder for a stronger chocolate flavor?
Yes, but it may darken the red color slightly.
How do I get distinct swirls?
Don’t overmix the batters—just a few gentle swirls with a knife or toothpick are enough.
Can I make them ahead of time?
Yes, they actually taste even better after chilling for a few hours or overnight.
Can I serve them warm?
They’re best cooled for clean slices, but you can enjoy them slightly warm with ice cream for a decadent dessert.
Conclusion
These Red Velvet Cheesecake Swirl Brownies are a dessert lover’s dream, combining the best of two classic treats in one irresistible bite. With their fudgy red velvet base, creamy cheesecake swirl, and beautiful marbled look, they’re the perfect treat to impress at gatherings or to savor at home. One bite is all it takes to fall in love with this indulgent creation.
Print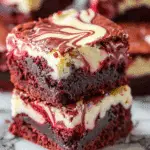
Decadent Red Velvet Cheesecake Swirl Brownies
- Total Time: 35–40 minutes
- Yield: 12–16 brownies
Description
These Red Velvet Cheesecake Swirl Brownies combine the rich, cocoa-kissed flavor of red velvet with a tangy, creamy cheesecake swirl. With their eye-catching marbled appearance and decadent taste, they’re perfect for holidays, parties, or any time you want to impress. Easy to make and bakery-worthy, they strike the perfect balance between fudgy and creamy in every bite.
Ingredients
For the Red Velvet Brownie Layer:
3/4 cup unsalted butter, melted
1 cup granulated sugar
2 large eggs
2 teaspoons vanilla extract
1 tablespoon red food coloring
1 teaspoon white vinegar
1 1/4 cups all-purpose flour
1/4 cup unsweetened cocoa powder
1/4 teaspoon salt
For the Cheesecake Swirl:
8 ounces cream cheese, softened
1/4 cup granulated sugar
1 large egg
1/2 teaspoon vanilla extract
Instructions
- Preheat the Oven:
Preheat to 350°F (175°C). Line an 8×8-inch baking pan with parchment paper (with overhang for easy removal) or grease well. - Make the Red Velvet Brownie Batter:
- In a large bowl, whisk together the melted butter and sugar until smooth.
- Add the eggs, vanilla extract, red food coloring, and vinegar. Mix well.
- Sift in the flour, cocoa powder, and salt. Gently fold until just combined.
- Pour most of the batter into the pan, reserving about 1/4 cup for swirling.
- Make the Cheesecake Swirl:
- In a separate bowl, beat the softened cream cheese and sugar until smooth.
- Add the egg and vanilla extract, mixing until creamy and lump-free.
- Assemble the Brownies:
- Spread the cheesecake mixture evenly over the red velvet batter in the pan.
- Drop spoonfuls of the reserved red velvet batter on top.
- Use a knife or toothpick to gently swirl the two mixtures for a marbled effect.
- Bake:
- Bake for 25–30 minutes, or until the center is set and a toothpick comes out with a few moist crumbs (not wet batter).
- Avoid overbaking for the best texture.
- Cool and Serve:
- Let the brownies cool completely in the pan.
- Use the parchment paper to lift them out and slice into squares.
- Serve chilled or at room temperature.
Notes
- Add white or dark chocolate chips for extra indulgence.
- Use natural food dye or beetroot powder for a more subtle red color.
- Sprinkle crushed candy canes or festive sprinkles on top for holidays.
- For extra fudginess, melt in 2–3 oz of chocolate into the brownie batter.
- Double the recipe for a 9×13-inch pan and increase bake time to 35–40 minutes.
- Prep Time: 10 minutes
- Cook Time: 25–30 minutes
- Category: Dessert, Snack
- Method: Baking
- Cuisine: American

